

* Applying Columns Setting *
* In this chapter, we will learn how to apply Columns setting in Microsoft Word.
Adding columns is a part of a document.By default, Word creates text in a single column. You can format text in multiple columns.
Using columns in MS-Word makes Word documents easier to read.
Now we will learn how to applying Columns setting. So, lets start:
⇨ How to set Columns?
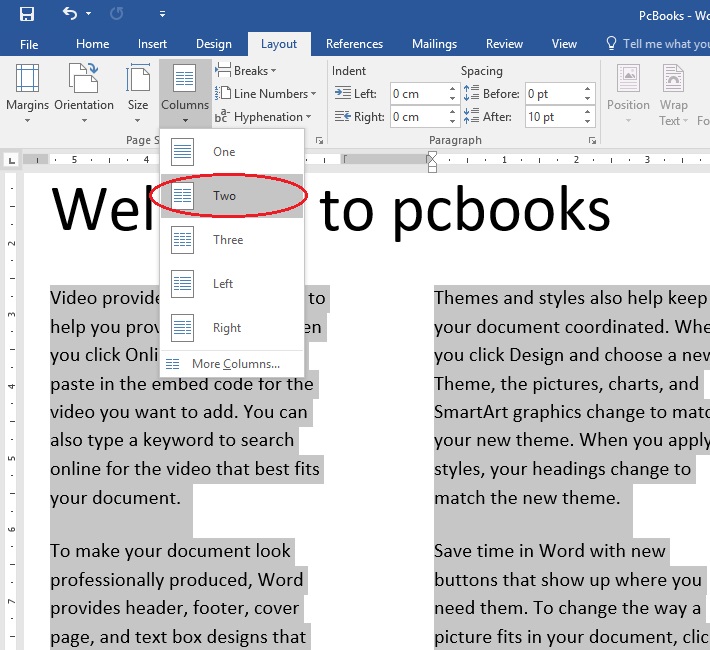
a) At first write down any text.
b) Select the text.
c) Click on Layout or Page Layout Tab.
d) Click on Columns from Page Setup group.

e) Select any format.
***Adjust spacing: If you donÆt want your columns to all be the same width, be sure to uncheck the ōEqual column widthö checkbox at the bottom of the dialog box.
* Click on Columns from Layout or Page Layout Tab.
* Click on More Columns.

* Uncheck the ōEqual column widthö checkbox.
**You can also adjust width and space of columns.
* Click on Ok.

⇨ How to delete Columns?
a) At first write down any text.
b) Select the text.
c) Click on Layout or Page Layout Tab.
d) Click on Columns from Page Setup group.
e) Select One to change into single column.
⇨ How to set Columns?
a) At first write down any text.
b) Select the text.
c) Click on Layout or Page Layout Tab.
d) Click on Columns from Page Setup group.
e) Select any format.
***Adjust spacing: If you donÆt want your columns to all be the same width, be sure to uncheck the ōEqual column widthö checkbox at the bottom of the dialog box.
* Click on Columns from Layout or Page Layout Tab.
* Click on More Columns.
* Uncheck the ōEqual column widthö checkbox.
**You can also adjust width and space of columns.
* Click on Ok.
⇨ How to delete Columns?
a) At first write down any text.
b) Select the text.
c) Click on Layout or Page Layout Tab.
d) Click on Columns from Page Setup group.
e) Select One to change into single column.


