

* Working with Autotext *
⇨ In this chapter, we will learn how to work with Autotext in Microsoft Word.
Auto-text is a portion of a text which is already exist in the computer memory.
It can contain a few letters, words, sentences or paragraphs.
If We need to re-type a block of text again and again in our documents,
we can use AutoText option to insert them by typing a short code instead.
It is an easy way to create a document more quickly.
Now we will start, so lets go:
⇨ How to apply Auto-Text Option?
a) At first write down any text.
b) Select the text which you want to add in Autotext.

c) Click on Insert Tab.
d) Click on Quick Parts.

f) Click on Save Selection to Quick Parts Gallery.

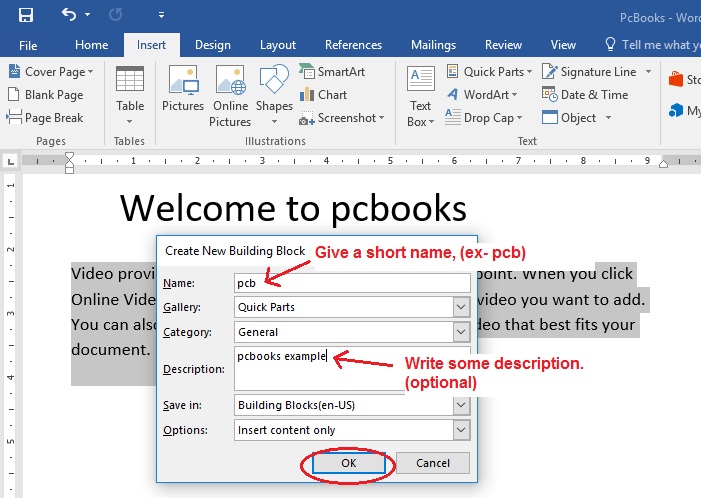
g) Write down any short name.
*** It is very important as it will provide a short code name to the entire selected text.
h) Write down small description. It is optional.
i) Click on ok.
⇨ How to Run Auto-Text Option?
a) Write down the short name.
b) Then press F3.
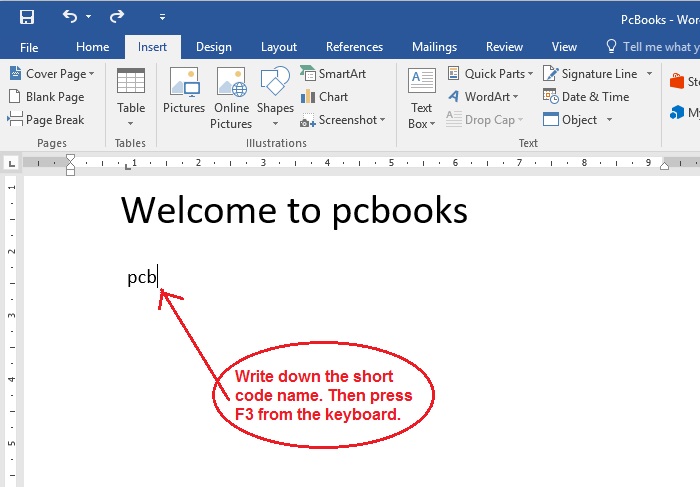
*** Look, the entire text will automatically inserted.
⇨ How to delete Auto-Text option?
a) Select the text.
b) Click on Quick Parts.
c) Click on Building Block Organizer.

d) Select your short name.
*** To find the short code name, click on Building blocks list then press the first letter of the code. It will help you to find quickly.
e) Click on delete.
f) Click on Yes and close the window.

⇨ How to apply Auto-Text Option?
a) At first write down any text.
b) Select the text which you want to add in Autotext.
c) Click on Insert Tab.
d) Click on Quick Parts.
f) Click on Save Selection to Quick Parts Gallery.
g) Write down any short name.
*** It is very important as it will provide a short code name to the entire selected text.
h) Write down small description. It is optional.
i) Click on ok.
⇨ How to Run Auto-Text Option?
a) Write down the short name.
b) Then press F3.
*** Look, the entire text will automatically inserted.
⇨ How to delete Auto-Text option?
a) Select the text.
b) Click on Quick Parts.
c) Click on Building Block Organizer.
d) Select your short name.
*** To find the short code name, click on Building blocks list then press the first letter of the code. It will help you to find quickly.
e) Click on delete.
f) Click on Yes and close the window.


